Intro to Authentic
November 12th, 2015
An introduction to using Authentic to add authentication to your web apps and microservices.
- The Table of Contents
- I. What's this Authentic thing?
- II. Why would we use it?
- III. OK, let's do it!
I. What's this Authentic thing?
Authentication is knowing who a user is. Authorization is knowing what a user is allowed to do. Authentic helps with authentication by letting you identify a user by their email address in your apps and services. Once you know a user's email address, you can use this as a unique ID to handle authorization.It's also useful as an ID for storing and retrieving other info and meta data (like name, phone number, address, etc...).
Authentic can be run as a standalone server that will sign users up (get their email and password), send them a confirmation email (so you know that it's them), and of course let them log in. In this case, when they log in, Authentic will respond with an authentication tokenThe token is a JSON Web Token or JWT. Essentially it's an encrypted JSON object. that can be used by other services and apps to know the user's email -- without having to make a request to a central server each time.
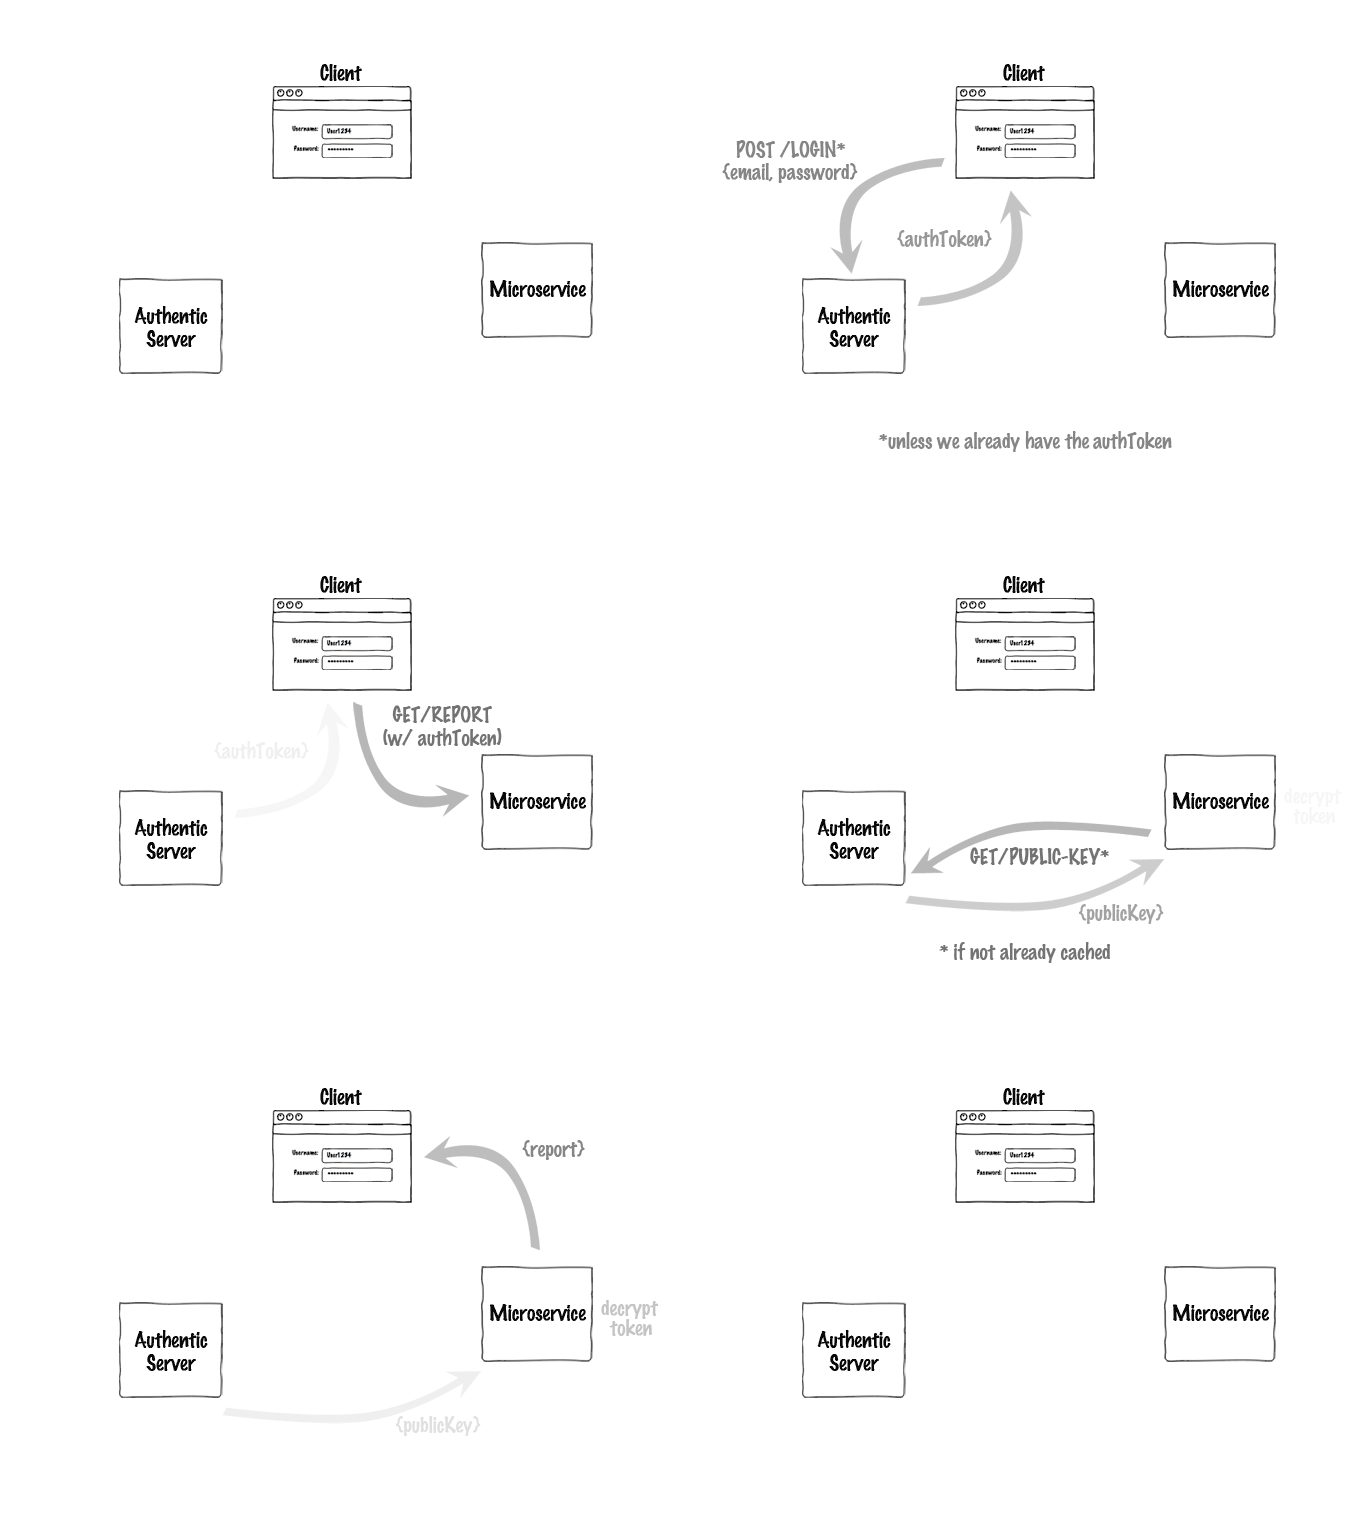
Authentic can also help on the service and client sides to make requests to the server and decrypt the token. Here's how the whole system would look for a user logging in and requesting a report from a separate microservice:

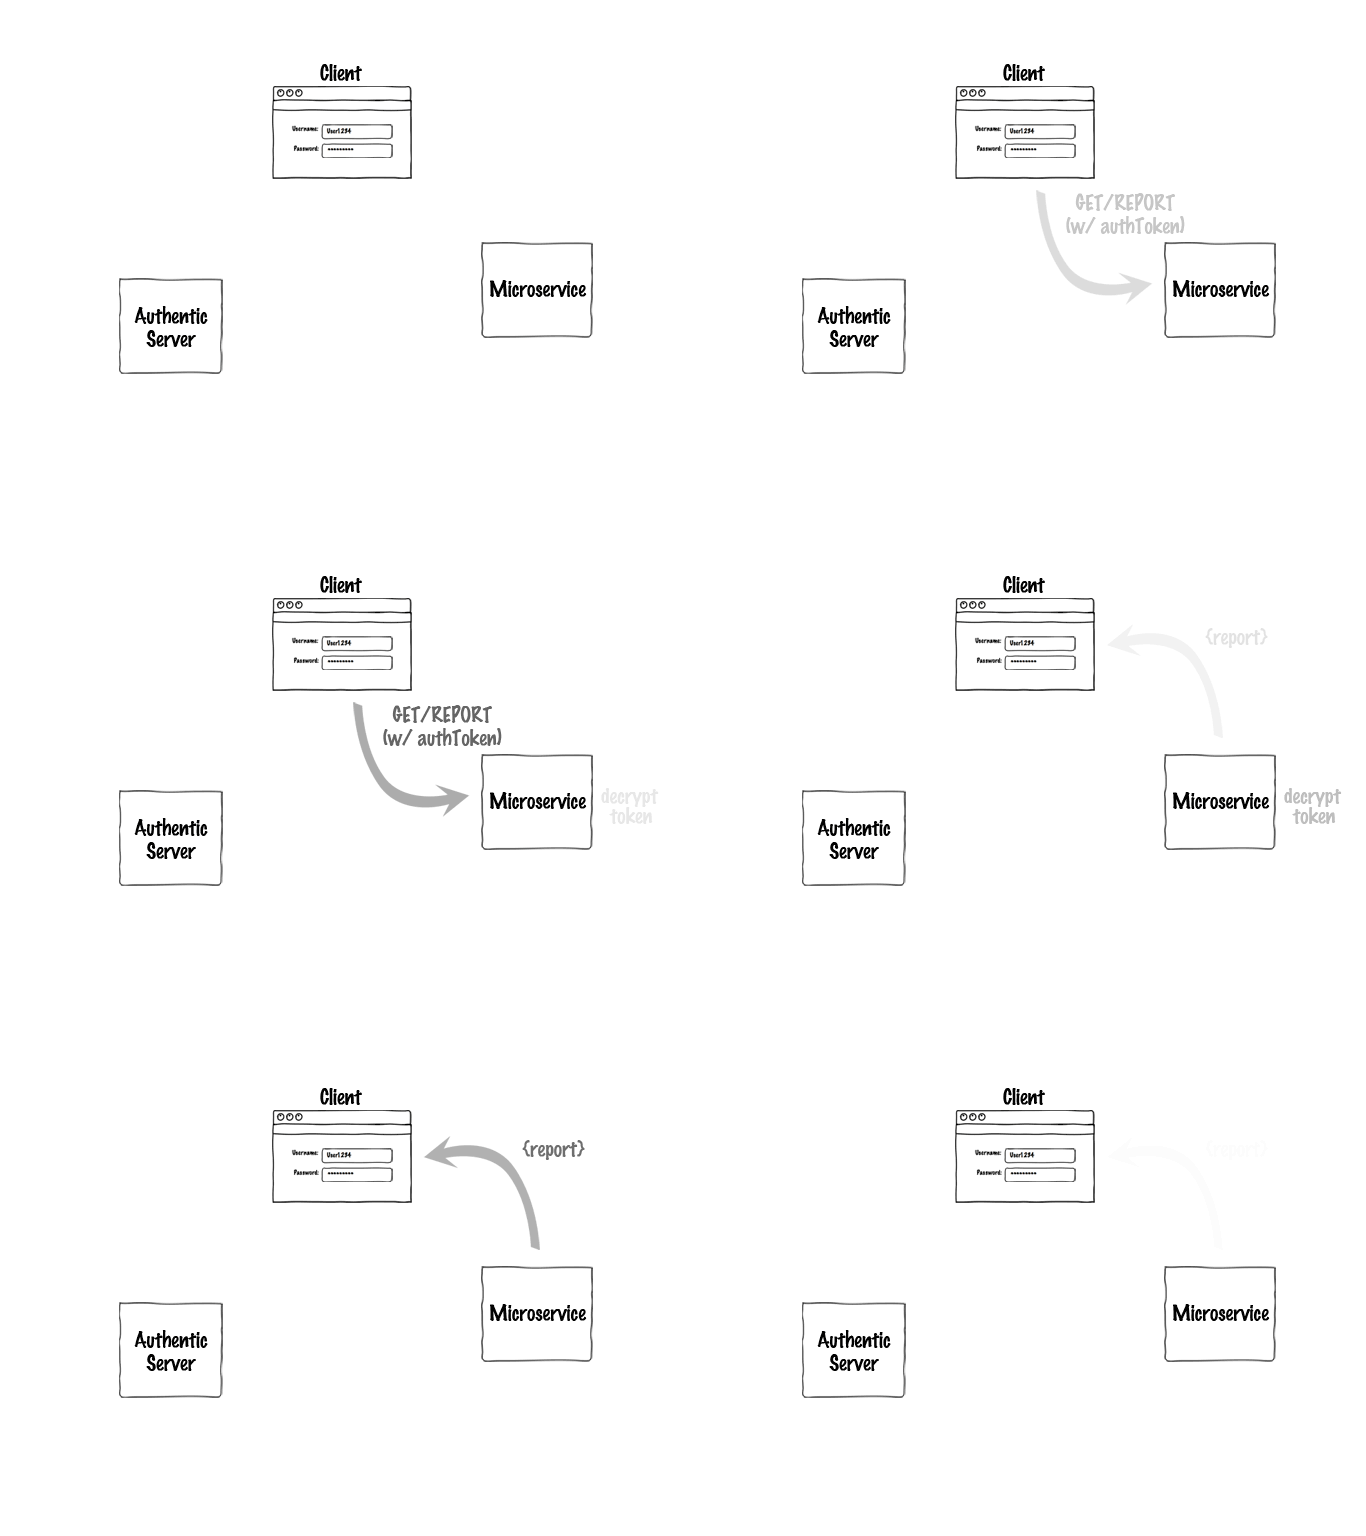
Of course, the user doesn't have to log in for each request, and the microservice can cache the server's public key, so 99% of the time it would just be this:

II. Sounds cool, why would we use it?
Here's a common situation: your company has a bunch of microservices, and you need to make sure that they are only accessible to the people you deem worthy.
For example, let's pretend you're in charge of engineering for ScaleHaus, and for simplicity, you want to start your microservice empire with the following two apps/services: reporting.scalehaus.io and admin.scalehaus.io. reporting.scalehaus.io is your reporting/analytics microservice and is a JSON REST API and admin.scalehaus.io is a single-page-app UI for viewing reports that lives on a CDN and has no server component.
To add authentication and authorization (restrict access to ScaleHaus employees) you could do the following:
1) Create an authentication server with authentic-server and make it available at auth.scalehaus.io.
2) Use authentic-client to add views to admin.scalehaus.io for signup/confirm/login/reset-password and for requests to reporting.scalehaus.io.
3) In reports.scalehaus.io, use authentic-service to decrypt the authentication token provided in the request and verify the user's identity and that their email ends in "@scalehaus.io".
III. OK, let's do it!
Great, glad you're on board. Let's walk through building out the hypothetical situation above.
Step 1: The Server
First, grab your favorite terminal and create a new directory for your authentication server (auth.scalehaus.io in the above scenario):
Next, we'll create our public and private keys:
Now that we have those, we can create our server. Create a new file server.js Fun fact: npm start will run node server.js by default and use authentic-server like so:
Then run npm start and you should have your auth server running. To test it out, let's open a new terminal and use curl to sign up a new user:
The response to the curl should look like this:
And your auth server should have logged something like this:
There are two things to note. First, because the sendEmail function we gave authentic-server doesn't actually send email, it just logs the email data to the terminal, that's what it did.If you'd like to see an example of a sendEmail function that actually sends email, here's one using Mandrill and powerdrill Second, when you sign up a user, authentic-server requires three things: 1) email 2) password 3) confirmUrl. To confirm a user, we want to verify that the user owns that email address. To do this, we send an email to that address and they return with the correct confirmation token. confirmUrl is where we'd like them to return to.
Astute readers will note, however, that the url we provided doesn't exit yet, and we can't confirm our user -- let's change that real quick.
Step 2: The Client
Create a new, separate project and directory for our "admin" app:
This app will be client-side only, so we'll make life easy by using wzrd to give us a static server that will automatically run browser JS for us:
npm i --save wzrd
Once that's done, edit your package.json to add a start script that will run wzrd index.js. The relevant part of package.json should look like this:
To verify that it's working, let's add an obnoxoius alert to index.js:
echo "alert('hi from wzrd')" > index.js
Now let's npm start and open the app by going to http://localhost:9966 in your browser of choice. You should see the alert.
Rockin, we have our browser code up and running. Let's use authentic-client to provide an interface to our auth server. Install authentic-client:
npm install --save authentic-client
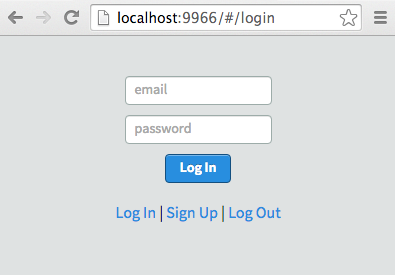
Now we'll create a user interface using authentic-client to talk to authentic-server. We could do this part with React, Mercury, Backbone, Angular, Elm, Mithril, etc... but for simplicity copy this vanilla approach into index.js and reload. You should see something like the following:

Feel free to go through the sign up/confirm/login flow. 95% of index.js is now UI wrangling, but you can see examples of authentic-client's use in signupRoute, confirmRoute, and loginRoute.
Once you log in, the UI will attempt to hit your not-yet-created microservice. Your nonexistant microservice will not respond, and you'll see a network error.
But here's the good news: all that's left now is to create a microservice with a protected endpoint!
Step 3: The Service
Open up a new terminal and create a new project/directory:
Create an http server in server.js that uses authentic-service like so:
Once that's running you can either use authentic-client (either in node or in browser) or curl to make authenticated requests.If you use curl or are crafting the HTTP request yourself, place the auth token in the Authorization header using Bearer schema. It should look like this: Authorization: Bearer eyJ0eX.... For more info see How do JSON Web Tokens Work?
Feel free to change the authorized email(s) in authorized to either block or allow requests based on the identity of the user.
That's it!
You now have the basic scaffold for handling authentication with microservices: a standalone authentication server, a client/UI for handling user logins, and a protected microservice.
Nice work!
If you have any questions or ideas, feel free to reach out on Twitter or Github.